Showing posts with label disney. Show all posts

Clean cup, clean cup. Move down.

Wednesday, September 14, 2011

Walmart has flower pots shaped like giant teacups. Walmart has flower pots shaped like giant teacups. This is exciting because 1) I love teacups, and 2) I love things in sizes that they are not usually in.

So of course I bought one.


It's obviously a ridiculous thing to buy, so I almost didn't... but then I did. Because, when you have the opportunity to turn a large-sized teacup into a small-sized Disneyland teacup, you do it. So I did, and so should you.

This project is fairly simple, if not a little time-consuming. I just did a little bit at a time, over several days, since there's a lot of waiting for paint to dry between coats. With all the coats you have to do, trying to do this in one day, I imagine, would be very frustrating. Also, being that it's fairly easy to copy, I'll try to keep the steps brief.

Materials
  • a teacup
  • a teacup design
  • spray paint in your base color (I used white)
  • acrylic paint in the other colors
  • paint brushes
  • a compass (not the directional kind)
  • painter's tape
  • glossy spray-on sealer

Steps
1) Spray your base coat in several thin layers, letting the layers dry in between coats. If you try and do one thick layer, you will have drips of paint all over the thing. I did four layers.

2) If your inside is a different color than your outside, paint the inside. If not, skip this step.

3) Paint the saucer, the rim of the cup, and handle. There are a few ways to get straight (well, circular) lines around your cup: to draw lines on the saucer, I used a compass (first picture); to draw the line around the inside rim, I used a compass a slightly different way (fourth picture); to get a nice, crisp line around the outside rim, I made pencil marks 1/2" from the top, and used those to guide painter's tape around the outside (second and third picture). I did between two and five coats on these parts.

4) Tape off (or use the compass to draw guidelines) the second line around your cup and paint it. Be careful with metallic paint--it tends to dry rubbery, and can peel off easily. In fact, I might recommend you draw lines with the compass, rather than tape it off; I had some difficulty with the tape. I did five coats here.

5) Trace on your pattern and paint it. You can use my stencil if you'd like, or create your own. I just printed it on regular paper, and cut off each heart after I traced it.

6) After it's completely dry, spray it with some kind of glossy outdoor-appropriate sealer. One coat should be fine; I did two just to be safe. When it's dry, it's done!


After mine was all dry and done, I planted some junk mail from Google in it. Yup. I'm excited.

Tilt-Shift Your Way to Glory

Friday, August 26, 2011

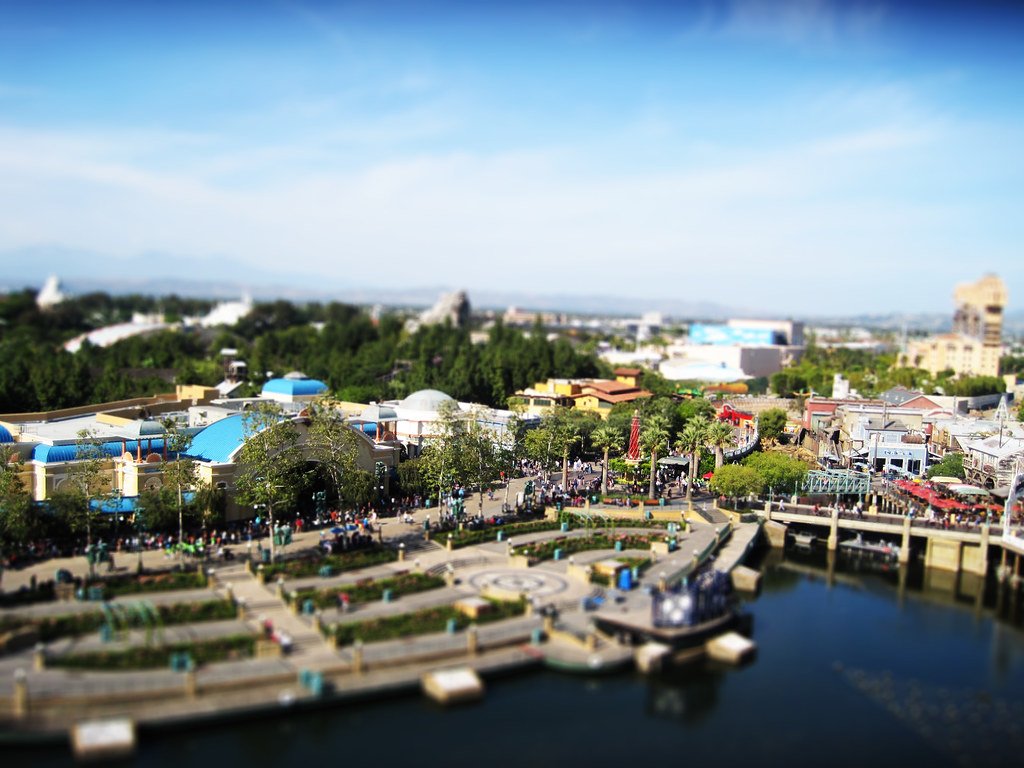
I'm kind of obsessed with tilt-shift photography. Which is a shame because I've only been able to pull off a tilt-shift once so far.

Tilt-shift refers to the practice of adjusting the focus of a photo or video in such a way that the content looks like a miniature model, preferably complete with little tiny people bustling around. Fancy-pants people accomplish this with a tilt-shift lens on their fancy-pants camera, but the effect can be accomplished well enough in Photoshop. In fact, the Camera 360 app I have on my phone has a tilt-shift option.

by Jack Ambridge
The part I find tricky is finding locations high enough to take a good shot from, as you kind of need to be... up to pull off a good tilt-shift image. If you search for "tilt-shift" on Flickr you will find an excess of examples of people trying to make a tilt-shift image out of photos that are just plain too close.

So, if you're going to try this, be sure you're taking your photo from far away and from above. Or below, I guess. It's possible to make a tilt-shift photo from ground-level, but I've seen very few examples where it hasn't come out looking lame. Once you've got a photo that you think will look cute all fake-miniaturized, here's a good tutorial on how to get the effect. Or just upload it to TiltShiftMaker.com. You know, whichever.

The one I made was done in Photoshop, and I took it from the top of Mickey's Fun Wheel in Disney's California Adventure park.


The Happiest Place on Earth, Fo' Sho'

Tuesday, September 28, 2010

I finally caved and bought a Disneyland pass. I've never had one before. I've always wanted one. I love knowing that, if I wanted to, I could hop on my bike and go to Mickey's house right now.

It's really all I need to feel that all is right in the world. Famine be damned.

(source)
Last night I saw the newest fireworks show. If you didn't know, Disneyland has the best fireworks show on the planet. I don't even like fireworks, but the Disneyland fireworks show makes me giddy. I hear the fireworks from my house every night, and, while some people file noise complaints (their lives are tragic), I get excited and have been known to yell out "It's 9:30!"

Speaking of the fireworks show, we sat down right in the middle of the street to wait for it to start, and after a couple of minutes I realized that my mother's cousin was sitting directly in front of us. It's a small world after all.

I begged and begged and begged them to give me a job, thus saving me the $239 I spent on the pass. Alas, they would not. Or at least not yet--I'm still on the waiting list for an opening for another couple of months.

I'm going again on Wednesday. Hopefully I'll get to see the World of Color show, which I have been anxious to see for a couple of years now.

Related Posts Plugin for WordPress, Blogger...