


Unfortunately, I don't have many Halloween decorations.
So I made some.
Perhaps other people would like to make some too.
Halloween Lanterns~!
 |
| I know, my setup is very Halloween-y. |
1) cardstock - one sheet per lantern
2) vellum - one sheet per three lanterns
3) electric tea light candles
4) scissors
5) exacto knife
6) cutting mat
7) pencil
8) glue stick
9) the lantern pattern - get it here

Print the pattern, cut it out, and trace it onto the black cardstock. I used white cardstock so that (a) the stencil would be sturdy, and (b) I can use the stencil to make another lantern when I'm done.
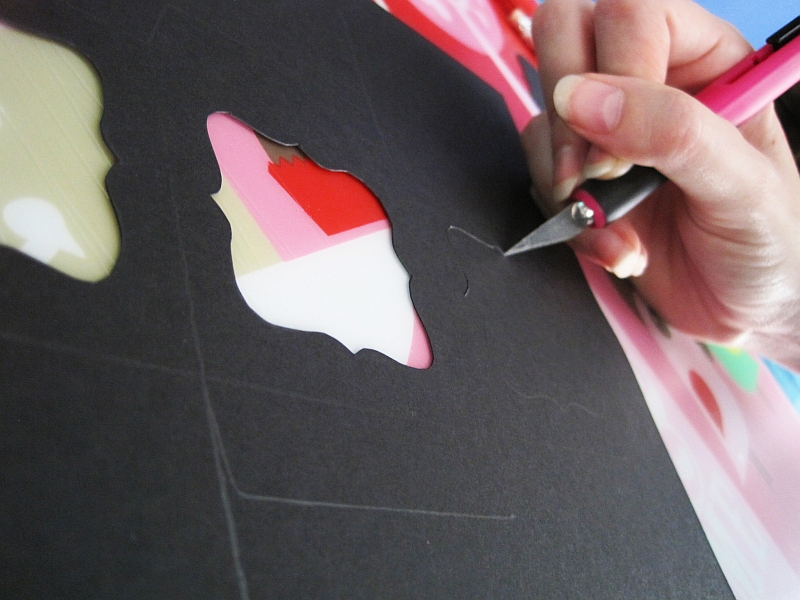
Cut it out. A sharp exacto blade will make all the difference here. If your blade doesn't cut the paper with little effort from you, do yourself a favor and buy some new blades.

Score the fold lines. Score the fold lines. Really, it'll make the folds cleaner and easier.
(Psst, "score" means you scratch it, like with scissors.)

Find some images for your vellum windows. You're going to want to shrink and crop them down to 2"x2". Karen's Whimsy, The Graphics Fairy, and Google Images are all good places to find graphics for your lanterns. You can also download the images I used for my lanterns here. The file is in Microsoft Word format to (hopefully) make it easier to drop in your own images. The images are from a scrapbooking collection entitled Ravenhead Manor.
Anyway, print them out, cut them up, and glue them to the inside of the lantern windows.

Fold it up, glue the tabs, and drop in one of those battery-operated tea light candles. Close the top and it's done!
Finished~!


You can get the open-top pattern here.

Or, if you are feeling so inclined, you can fill it with treats!
To review, here are the files available for download:
pattern for the closed-top lantern
pattern for the open-top lantern
sample vellum windows

11 comments:
Wow! These are absolutely adorable! I am going to have to try and make them with my nieces this weekend. They would love them!
Ohh these are cool, I'm going to try and make them later. It would look awesome for the apartment
Oh my goodness! these are super fun and adorable! thanks for sharing.
Super cute. I wanna try! :O
I just put them around my house; they look totally pimp.
awww... i love these, will definitely try it! ;)
Those are gorgeous! I want to have a go at making some as well now :D
oh wow these are amazing! xx
girl i wish i had your talent!
From 2 followers to 26! Now, I'm the 27th! ;) I must say, you have some talent to do this. I'll definitely give this a try! :D
I found you on 20 Something Bloggers!
Much love!
Yes! Never underestimate the power of crafty goodness.
Hopefully my computer will be officially fixed tomorrow; I miss 20sb.
Post a Comment